
 Paperless is one of those annoying words that means different things to different people. Does it mean having absolutely no paper around? Does it mean just using less paper? Does it mean keeping no paper?
At the Evernote Trunk Conference, the company’s CEO Phil Libin said Evernote’s main competitor is not another software product, but pen and paper. I believe it.
Some people seem to think that paper is binary: you either use it or you use a digital device. In my opinion, it is more nuanced than that – it is not the use of paper that can become a problem, it is what we do with it after we use it.
Tablet apps have come a long way, but many people are most comfortable jotting things down or sketching on pen and paper first, and then digitizing. At the ETC event, Evernote and Moleskine’s CEOs reported that their research has found the same thing – there are a lot of people whose ideas start on paper but then transition to digital.[1]
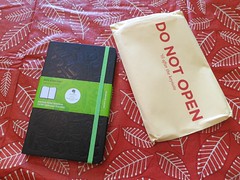
This led to the most surprising outcome from the conference: the Evernote Smart Notebook by Moleskine.[2] Each attendee was given one (thank you Evernote), so I thought I would take this opportunity to run through it for you.
The Notebook
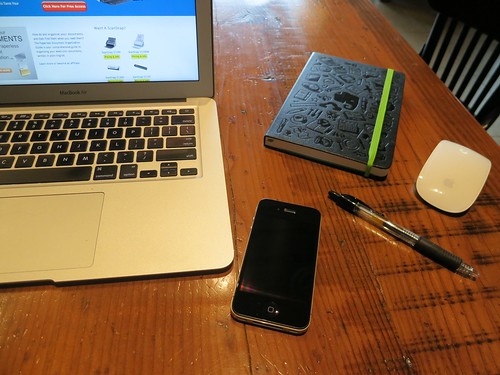
Like all Moleskine products, the notebook itself is gorgeous.
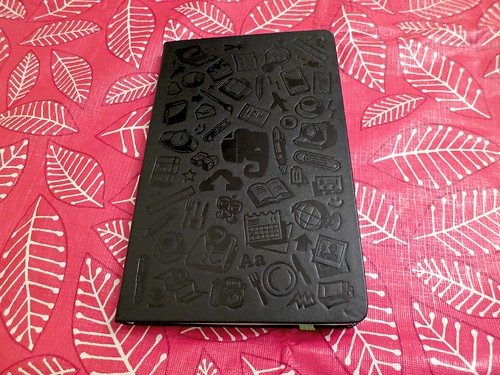
They’ve made the page marker “Evernote green” and have the Evernote logo and other designs on the front.
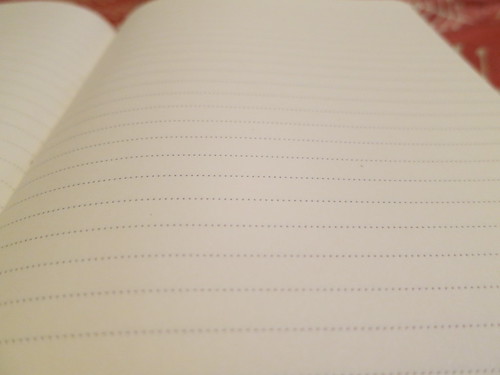
Inside is high-quality paper, and you can order it in either lined or squared. The one I received at ETC is lined. It comes in either a 3.5“ x 5” version or a 5“ x 8.5” version.
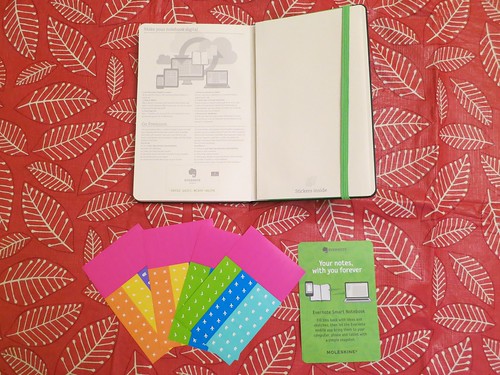
Moleskine notebooks typically have a pocket at the back, and inside the pocket of the Evernote Smart Notebook are four pages of stickers and some instructions for how to “go digital”.
On the back page of the notebook, there is a code for 3 months of Evernote Premium. Not bad – that’s $15 right there.
If you look closely at the paper, you will see that the lines are actually little dots. This will come into play in the next section when we get into page scanning.
Page Scanning
An Evernote-branded Moleskine notebook is pretty cool, but it would be a missed opportunity if they had stopped there. In the latest version of their iOS app, they have added Page Scanning functionality that is specifically built to support their Moleskine. Don’t worry Android fans, apparently Android support is in the works.
Now, Evernote did not invent smartphone page scanning. You’ve been able to use your phone to scan to Evernote for quite some time, and I have written about some iPhone document scanning apps and Android document scanning apps that can do just that. What Evernote has done is put their resources behind making something extremely easy.
As with most of my smartphone scanning tests, I am writing this at Starbucks to simulate a real-world environment. I am also drinking a free Americano with the card that I received for my birthday, so it is extra delicious.
To use Page Scanning, fire up the Evernote app, create a new note, and hit the Camera button as before. Now there will be a new option up at the top for Page Scanning mode.

To enable it, tap it and choose On.
Then you will want to fill up the rectangle in the middle of the screen with the text on your page and hit the Camera button to take the picture.
After you have taken the picture, it will say Processing, and then you will see a little number down in the bottom-right. That will show you how many pages you have captured. You can keep capturing away until you are done.

When you are done, hit the blue checkmark and it will attach your captures to your new Evernote note and upload it.
I have to admit, I didn’t find the process quite as smart as I had hoped. Maybe I am spoiled by straight-up document scanning apps, but I found I really had to mess around with the angle that I was scanning at.
A contributing factor may be that the lighting in this Starbucks isn’t the greatest. What I would advise is if you are going to use it, tap on the screen to focus the camera before snapping. Either way, I found that it captured more than I had expected.
Stickers
Page capturing isn’t anything too revolutionary, but what about these stickers that come with the Evernote Smart Notebook? What’s up with them?
This is pretty cool: they give you the ability to automatically move your notes to a specific notebook and tag them (!). Now things get interesting.
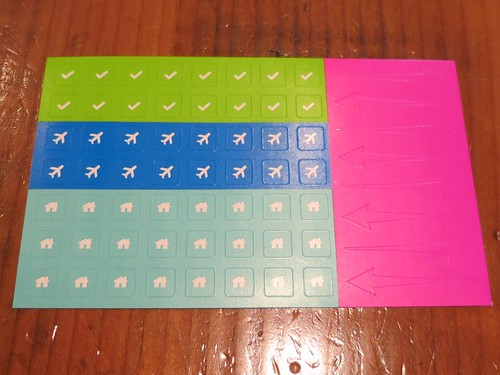
The app has built-in tags for these, but they are pretty generic. You can see the list here. We want to customize the list, so here is how to do it:
In the Evernote app, go to Settings, and then go to Smart Stickers.

You will see the stickers that you want to customize. In our case, let’s do the Work one, and I am going to do it to automatically tag DocumentSnap blog ideas.

I tap Work, and then I will set the Notebook and Tags that I want.

Now let’s throw a sticker on my page and see if this works.
Sure enough, it worked. Yeah! You can tell that it is tagged with the correct tag, and you’ll have to take my word for it that it is in the right notebook.
Should You Buy The Evernote Smart Notebook?
If you are a “notebook person” and capture to Evernote a lot, you might like this. The notebook itself is gorgeous and the auto-tagging with the stickers is very cool.
I have to admit, I was a bit underwhelmed with the camera capture. It would be nice to be able to adjust the capture area and enhancements like you can with most document scanning apps, but that is something that Evernote can improve over time in the software and doesn’t have anything to do with the notebook itself.
While $24.95 – 29.95 is pricey for a notebook, remember that it comes with 3 months of Evernote Premium, which doesn’t make it too much more than a “normal” Moleskine.
If you are someone that is all-digital or is cool with a $1.99 notebook from the drug store, the Evernote Smart Notebook is probably not for you. If you like nice notebooks and use Evernote, it might be worth checking out at least once.
The notebooks will be available in October but can be pre-ordered now.
-
Myself included. Even though I am “Mr. Paperless”, I carry around a notebook and pen. ↩
-
For more context on the announcement, see my Evernote Trunk Conference 2012 post. ↩