
 I have reviewed a few mobile scanners here on DocumentSnap[1], and they all share one limitation: in order to scan with them, they need to be plugged into a computer.
No matter how compact your scanner, if you need to lug a computer with it, you are not as portable as you could be.
When the Doxie folks let me know that they were coming out with a new scanner that could scan without being plugged in, I was intrigued. They were cool enough to send me a review unit, so here is my review of the Doxie Go.
What’s In The Box?
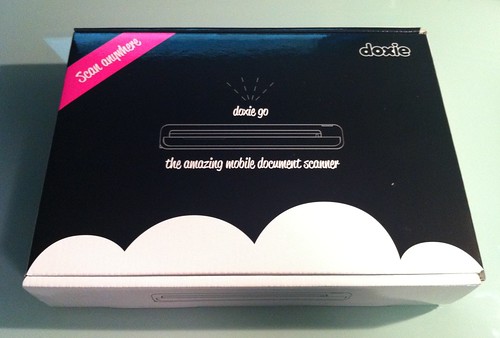
Right on the front of the box you can see that this thing is made for mobile scanning.
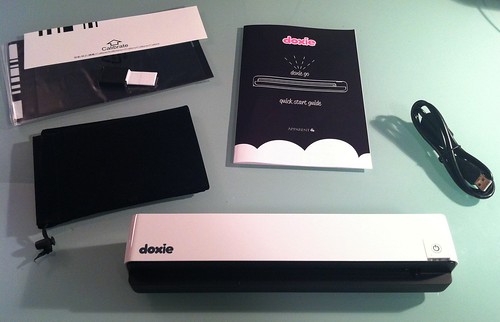
In the box is, of course, the scanner. Also included are a USB cable, a carrying bag, a calibration sheet, a cool little cleaning tool, and a photo sleeve for scanning glossy or sticky photos.
Like the original Doxie, there is no power brick. This scanner is powered entirely by USB. The company says that the scanner can scan 100 pages per charge, but I haven’t tested that myself.
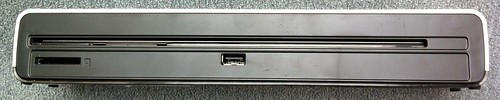
On the back of the scanner there is are SD and USB slots, which we will touch on later.
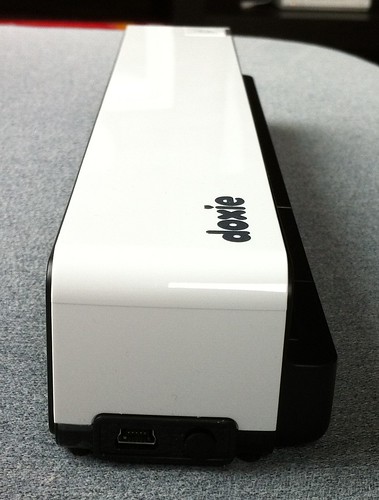
On the side, there is a USB port for plugging into your computer (again, more on that in a bit).
Size
The Doxie Go is 10.5“ x 1.7” x 2.2" (26.7 cm x 4.35 cm x 5.6 cm). This makes it a bit shorter and narrower than the original Doxie, but a bit taller.
It weighs 14.2 oz (403g), which makes it heavier than the original Doxie, which makes sense since it has to have all the memory stuff in it.
For a size comparison, here is the Doxie Go compared to Walter Isaacson’s Steve Jobs book:

Speed
The scanner’s listed speed is 8 seconds per page for 300dpi color. By my math, that is 7.5 pages per minute. Quite a bit faster than the original Doxie, but a touch slower than the ScanSnap S1100[2]
When I scanned, I was getting about 7–9 seconds per page, so 8 sounds about right.
Installation & Setup
As with the original Doxie, there is no included CD or DVD. You’ll need to be able to connect to the Internet and download the software to do the initial setup.

To set up the Doxie Go initially, it is a multi-step process:
- Plug the scanner in to the computer.
- Let it charge.
- Unplug, turn on, and calibrate.
The calibration step is similar to the original Doxie, but other scanners like the ScanSnap don’t require it. I am not sure what would happen if you don’t do it, but since the goal of any scanner is to have the best possible image, I recommend doing it.
I guess this is a nitpick, but it is a slight letdown to excitedly unpack the scanner, hook it up, but then have to wait a few hours for the scanner to charge before you can use it. It would be ideal if somehow the Doxie Go was ready to, well, go right out of the box.
Scanning Options
There is a subtle but important mindset shift that you need to perform when you are using the Doxie Go. It is not a desktop scanner!
This scanner is cordless by design, and is designed to be operated without being plugged into your computer. In fact, the Quick Start instructions even explicitly say “Don’t scan with Doxie connected to your computer.”
Every time you plug the Doxie Go in to your computer, it copies the scans and then disconnects the scanner. That’s not a bad thing, but it is a thing. If you are going to use the Doxie Go as your main scanner, you just need to remember: scan first, then plug in.
Speaking of scanning, you have a few options for how your files are saved:
- Scan to built-in memory: I haven’t been able to find out how much internal memory the Go has, but they say it can store 600 pages.
- Scan to an SD card or USB drive: Remember those SD and USB slots at the back of the scanner I showed you earlier? You can scan to one of those. If a SD or USB drive is plugged in, the Doxie Go will save your scans to that. No messing around with the setup required.
When the Doxie does its scanning, it saves the files to the storage as JPG files. This, combined with the ability to use an SD or USB card, opens up a bunch of possibilities.
A workflow that pops to mind right off the bat is to scan to an SD card, pop out the card, plug it into the iPad Camera Connection Kit, and you have your scanned documents on your iPad for further processing. You can operate without the need for a computer.

I’m sure you can come up with some other workflows where scanning to a memory card can come in handy.
You have two choices for scan quality: 300dpi or 600dpi. Unless you are scanning something for which you need super high quality, I’d recommend sticking with 300. Otherwise, the file sizes just get huge.
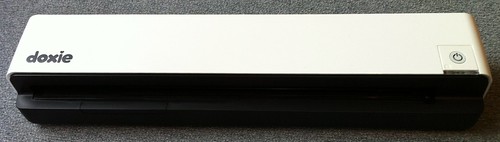
You control the quality of the scan on the scanner itself. You hit the power button and switch between 300dpi and 600dpi, and you can tell which mode you are in by the color of the power button. Clever and simple.
Speaking of simple, you don’t even need to press the button to scan. Just put the page into the scanner, and the Doxie Go will grab it and start scanning.
Software
The only time you deal with the software is when you plug in your scanner. I guess theoretically you could even get away with not installing the software at all, but I don’t know why you would want to do that. Your computer will see the scanner as a camera and treat your documents as pictures.
Importing Documents
When you plug in the Doxie, the software will detect that you have images to import and pop up the import wizard. Pink haters from the last Doxie will be happy to know that the pink appears to be gone.

Once it is imported, the originals will be deleted from the memory and the device will be ejected[3]

Stapling (Combining) Pages
One impact of having the original scans stored as JPG is that each page will be its own file.
Fortunately, the Doxie software makes it easy to combine pages into a single document, or “staple” them in their terminology.
Just highlight the pages that you want to combine and hit the Staple button. If the pages aren’t in the correct order, you can move them around before stapling.
This is obviously going to take a while if you are dealing with big documents, but if you deal with large multi-page documents on a regular basis, you are going to want a duplex scanner with a document feeder anyways.
OCR
At the time of writing this, the Doxie software does not yet support searchable PDFs. This is supposedly coming out in December 2011, so hopefully it will be here in the next few weeks.
Exporting Your Documents
The point of scanning documents is to do something with them, once you have your scanned imported into the Doxie software, you will want to export them. I save all my documents as PDF, so just highlight the file(s) and hit the Save button.

You can also export your documents to other applications on your system. This depends on your operating system and what you have installed on your machine. On mine, it helpfully pre-populated iPhoto, Preview, and Evernote.
Saving To The Cloud
If you want to save your documents directly to a cloud service like Google Docs, you can. Just set up your service and then hit the Cloud button. Here are the available services at the time of writing:

Scan Quality
Since scan quality can be pretty subjective, I have scanned a color page from a magazine and a black and white typed document. They’re linked below in PDF format, as well as the original JPG of the magazine.
- Color Magazine 300dpi (JPG)
- Color Magazine 300dpi (PDF)
- Color Magazine 600dpi (PDF)
- Black & White Document (PDF)
Bottom Line
As I mentioned before, if you are wanting a desktop scanner that is plugged in to your computer and that lets you preview your document after each scan, the Doxie Go is probably not for you. It is not a desktop replacement.
However, if you don’t need a desktop scanner and want a truly portable device, or a device for one-off scans that you can keep stowed away in a drawer or something, the Doxie Go is a good choice. I could definitely see my dad taking one of these around for doing his genealogy.
Availability
You can buy the Doxie Go from Apparent’s website, or on Amazon. If you buy it from Amazon, you’ll be buying me a cheap lunch, so thank you.[4]
What uses can you think of for a cordless scanner?
-
For example, the ScanSnap S1100 and the original Doxie ↩
-
It should be noted that the ScanSnap needs to be plugged in, though! ↩
-
This behavior can be changed in the Doxie’s settings. ↩
-
I think. I don’t even know if I get credit for Amazon fulfillment orders. ↩